Woodpecker Automates Your Email Outreach
Web Hosting & Domain Registration
We're going to need a hosting account and a few domain names. Note that we NEVER want to do any cold email outreach with our primary domain name.
Instead, we buy some alternate versions of our domain name and forward the "burner" domain over to our primary. This way if someone ever goes to the domain name of the burner email, they'll land on our primary website.

You'll Need an Account With Each of These Tools:

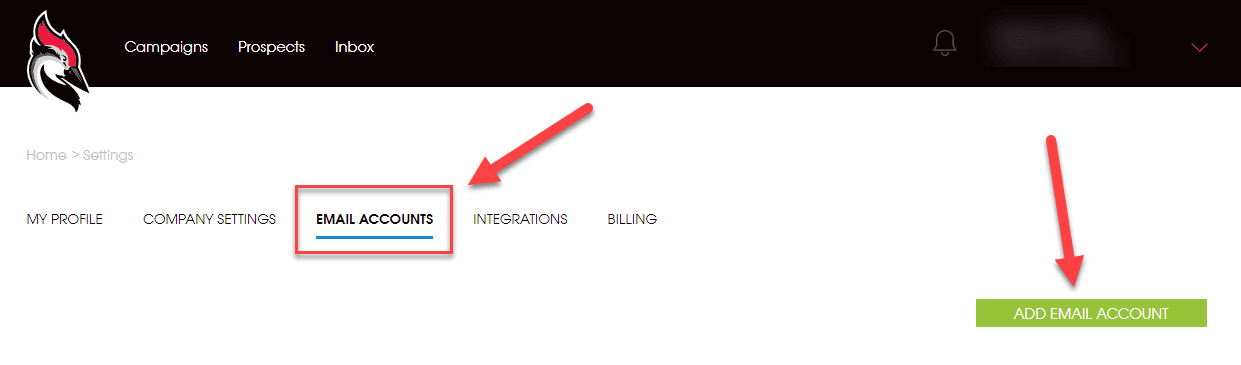
Setup Your Email Addresses
Per the instructions in our Domain Warming tutorial, you need to setup your email addresses and configure them in such a way that you will avoid the spam/junk filters. This ensures maximum deliverability in your campaigns.
Remember to follow these steps on each and every domain name from which you will be sending email addresses.
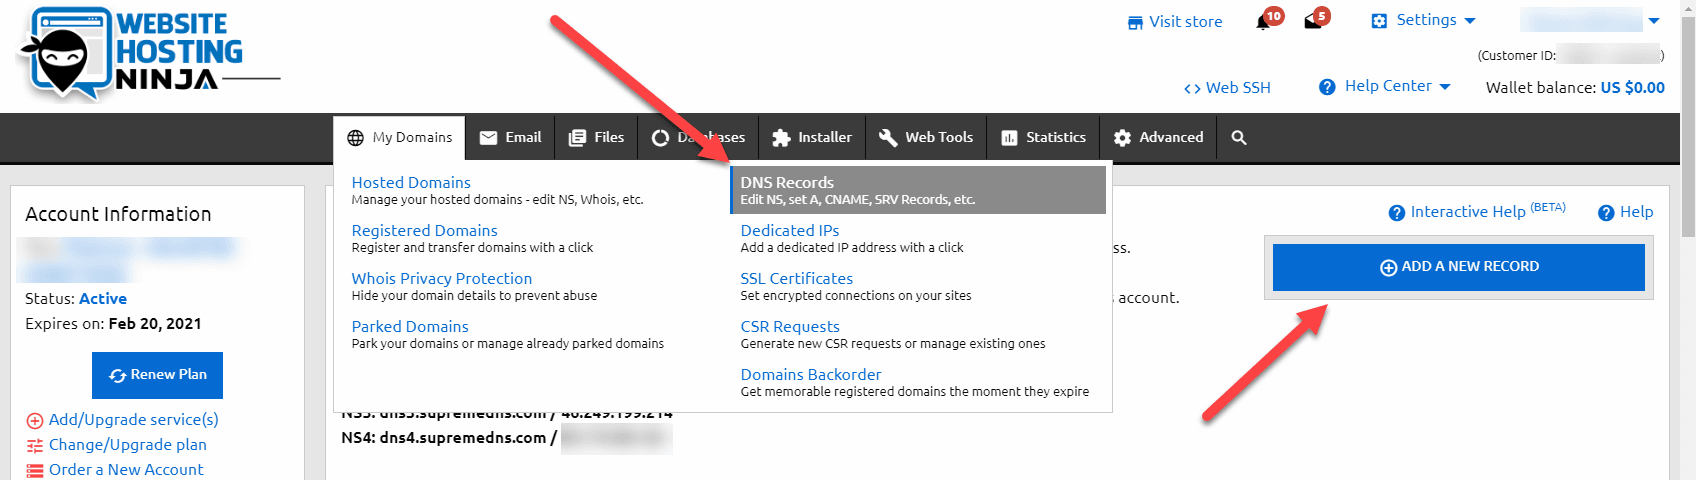
Add a DNS Record
Login to your web hosting account and go to your DNS Editor. We're going to add a new CNAME record for each domain from which we will send emails.
These records will later be used in Woodpecker to track link clicks effectively.

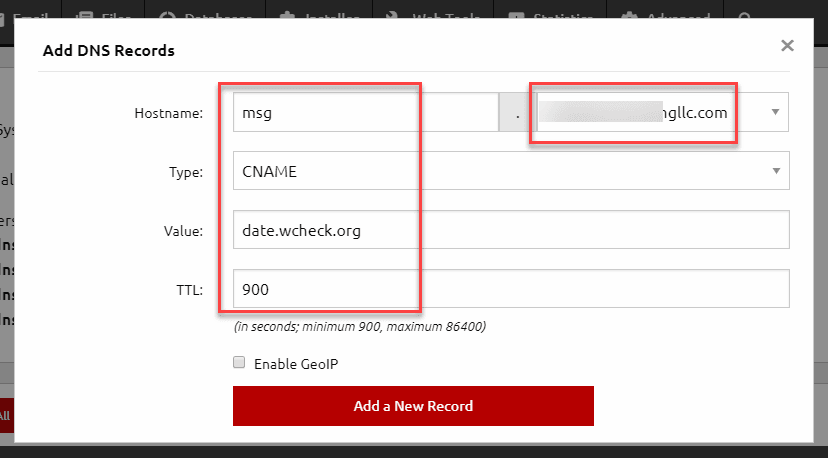
Add a CNAME Record
In the "Add DNS Records" box, enter whatever you'd like for the hostname text field. In this example, I'll use "msg" for 'message'. This link won't be used for human traffic- so it's basically irrelevant what you use here.
Make sure you select the correct domain name in the drop-down and then select "CNAME" as the Type. For the value, enter the text below exactly by copy/pasting it. This is the value needed for Woodpecker to work correctly:
- date.wcheck.org
Add Your Email Addresses to Woodpecker

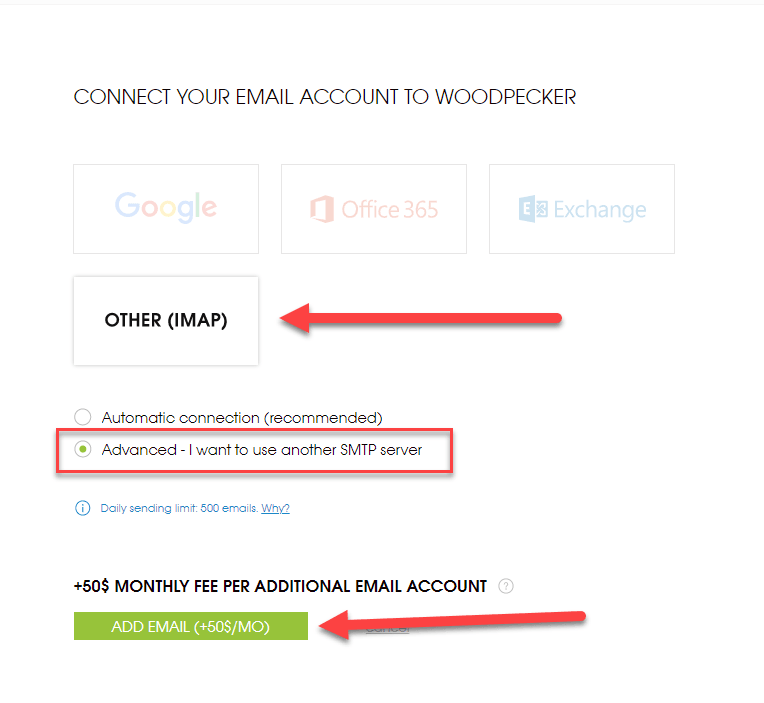
Configuration Settings:
- From Email - this is the email address you're sending FROM
- From Name - this is the name that shows up in the inbox. Put a first and last name here.
- Mail Server (both incoming and outgoing) = mail.supremecluster.com
- Incoming Port = 993
- Outgoing Port = 465
- Username = email address of that account
- Password = the password you setup for that email address


Additional Email Configuration
In order to track the custom links, we need to add another setting to the configuration of the email address(es).
Click the "gears" icon next to the email address we need to configure.
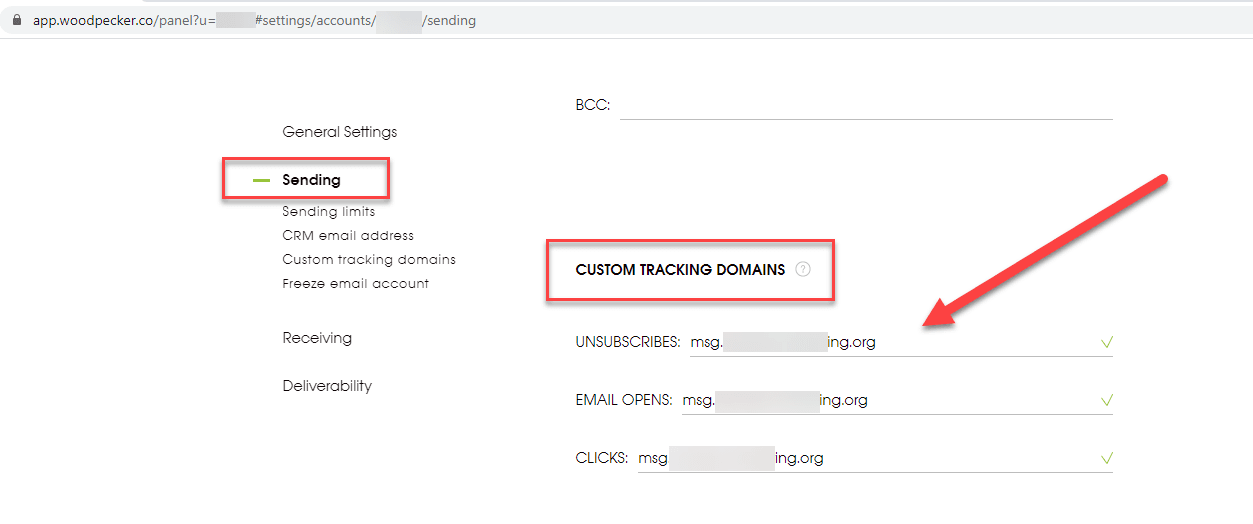
Add Custom Domain for Link Tracking
Remember that custom CNAME record we setup earlier in your DNS settings of your hosting account? This is where we need to add it.
In the "Sending" section of your email account, you'll need to add that record three times. See the screenshot for clarification.

Now We Need to Get Our API Key
Woodpecker API Key
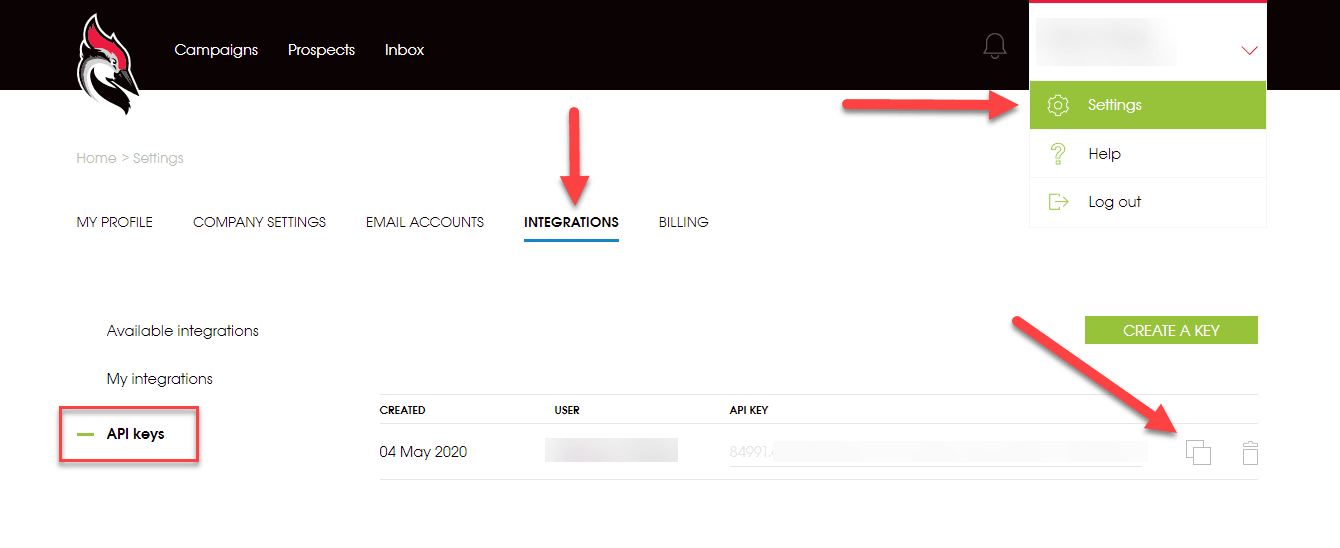
Now we'll grab our API Key from Woodpecker. Login to your account and go to "Account --> Settings". Then select the "Integrations" tab.
In the left hand column, select "API keys" and you'll see your actual API key. To the right of the actual key, you'll have the option to "Copy Key" by clicking on the copy icon. Open up Notepad (or any text editor) and Paste the API key at the top. Remember that this is the API key for Woodpecker.


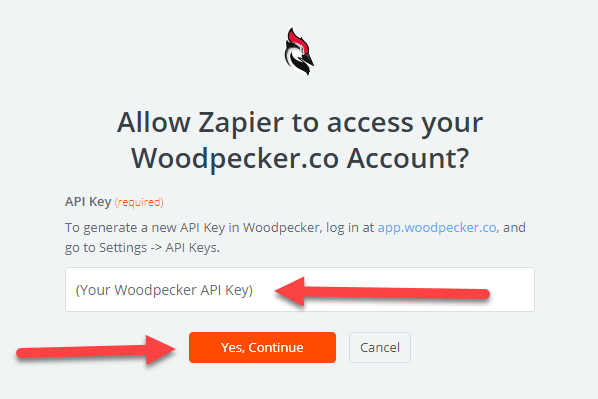
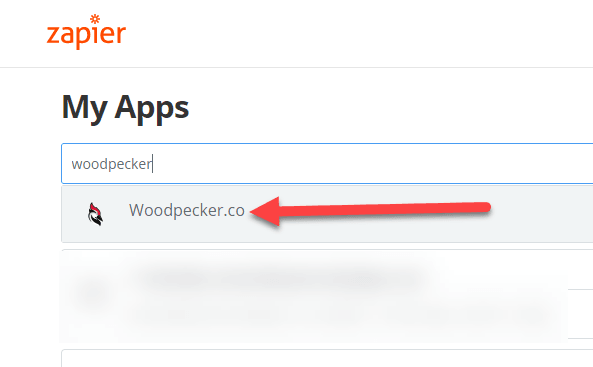
Configure Zapier
For our configuration with Zapier, we're going to need our Woodpecker API Key.
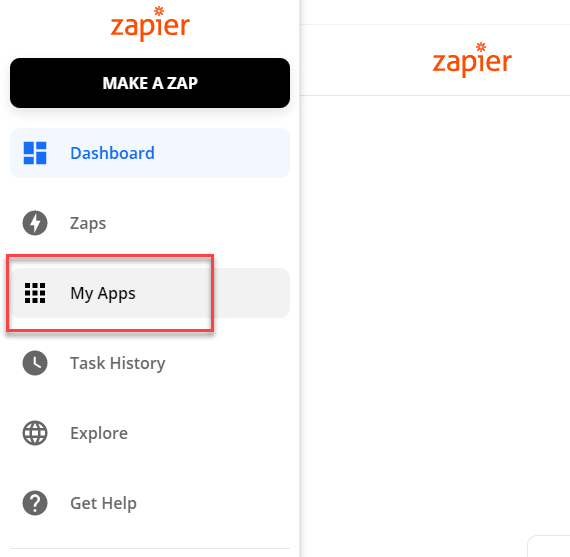
Login to your Zapier Account and go to "My Apps" in the left hand column.

