How To Configure Your Email Settings to Avoid the Spam Folder
Setting up a new email address is just the start. There are various values that need to be set in the DNS settings in order to make spam filters "trust" your email address to prevent ending up in someone's SPAM folder.
Note that this is a lengthy tutorial, and the topics likely seem quite technical. Don't let that dissuade you. This is important to do, and though there are several steps- they aren't difficult to do. Just follow each step in order and you'll get through it in a matter of about 30-45 minutes.
Tools That We'll Need
Mail-Tester.com
Web Hosting
Go To Mail-Tester.com
Mail-Tester.com
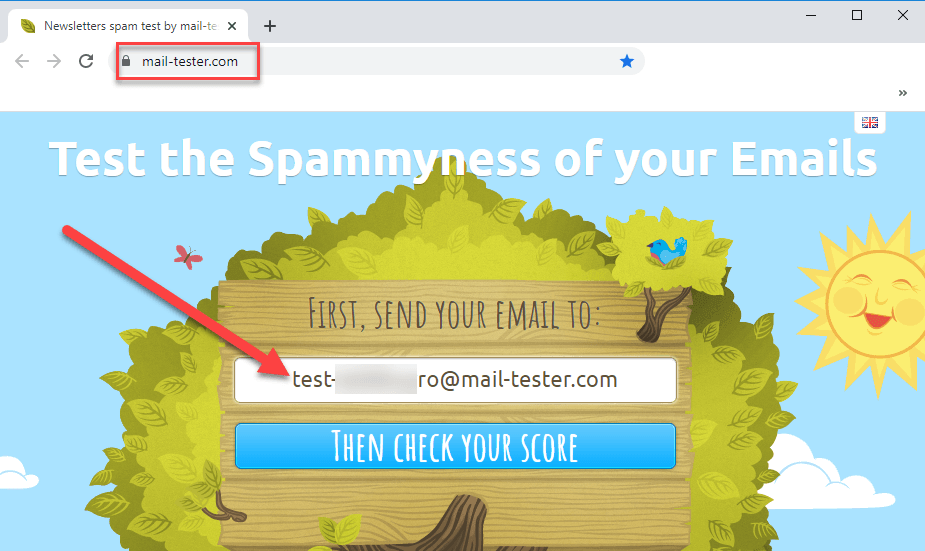
Go to Mail-Tester.com and copy the email address that is provided in the box.
Send an email to that email address using the email account of which you're trying to improve the deliverability. (Red arrow in the screenshot)
For the Subject you can use something like "Configuration Check for this Email Account" and then in the body say something like "This is an email to check the deliverability of my email account."
Once you've sent that email, click the "Check Your Score Button" on Mail-Tester.com (yellow arrow in the screenshot).
Copy Your SPF Value
Copy Your SPF Value
In the section that says "You're not fully authenticated" go to the section that starts with [SPF] and expand it.
In that section, you'll see a message that says "You do not have a SPF record..." and under it will be a value that you need to collect. This is the red box in the screenshot.
Copy that value.
DNS Records
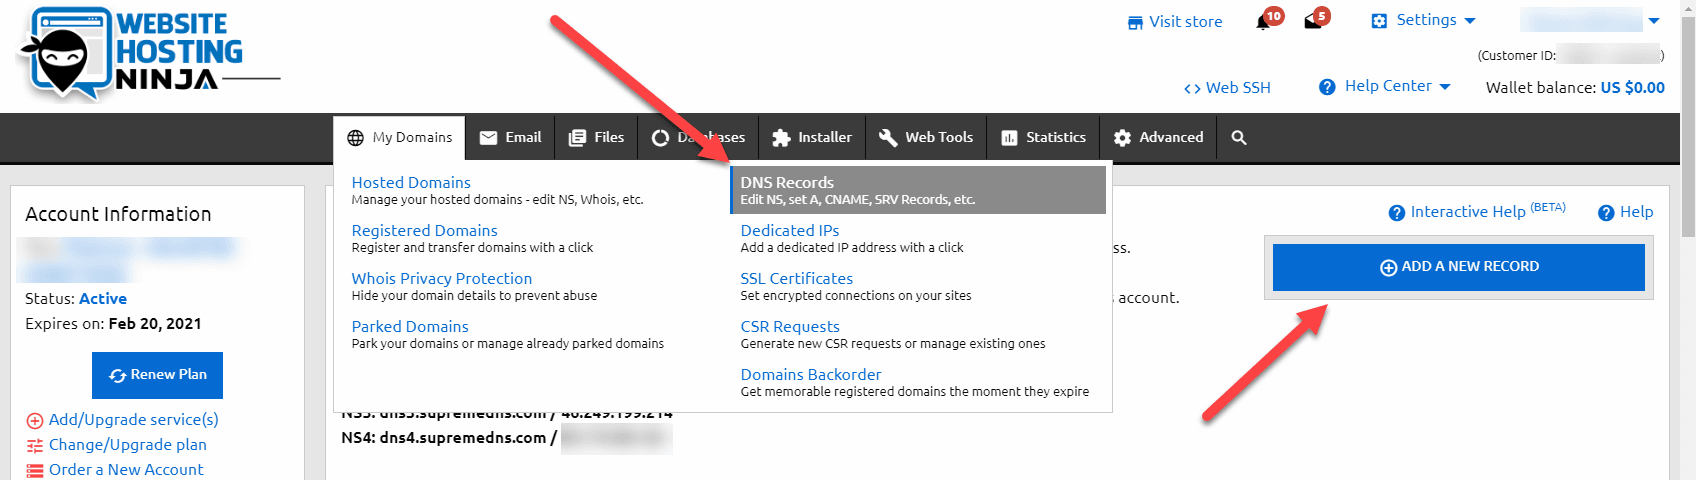
We will need to access the DNS records for the domain name with the email address we want to use. In our hosting area, that's under "My Domains --> DNS Records"
Once you're on that screen, click the "Add a New Record" button as outlined in the screenshot.
Adding the SPF Record
Add the SPF Record
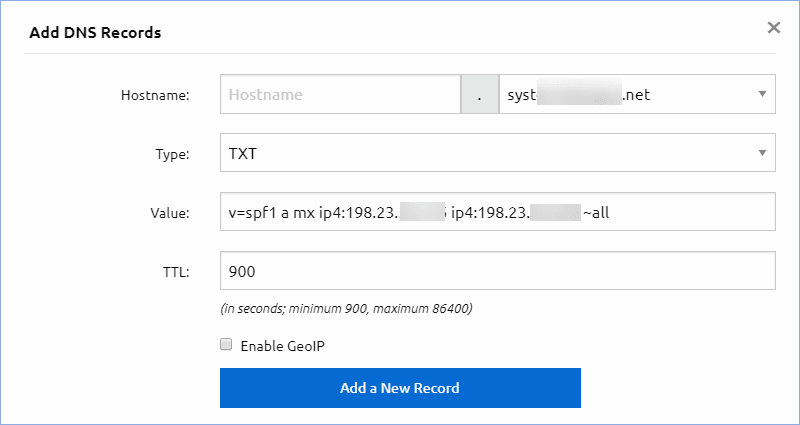
We're going to add a new record that will be from the SPF Record that you should have copied from the Mail-Tester.com tab.
- Leave the "Hostname" box blank and select your domain name from the drop-down options
- Select "TXT" as the "Type"
- Paste the SPF value that you copied in the previous step into the "Value" box
- Set the TTL for any number within the "minimum" and "maximum" levels
- (I usually go with the "minimum" value)
Adding the DMARC Record
Add the DMARC Record
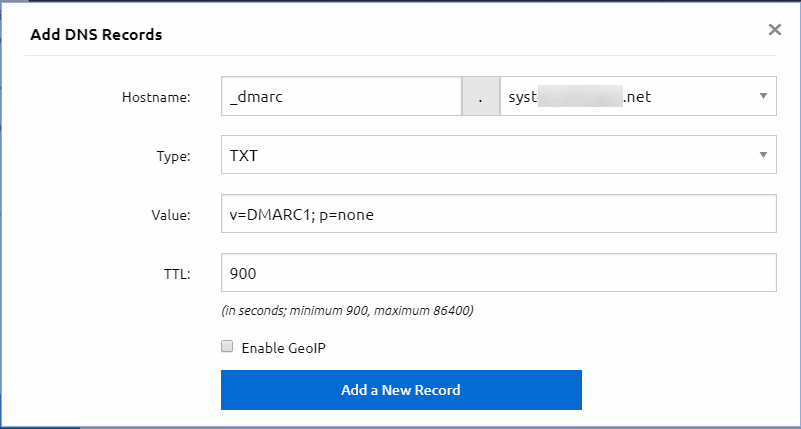
While we're in the DNS records, we're going to add one more for the DMARC record.
- Copy/Paste the following value in the first blank box (see the screenshot for reference)
- _dmarc
- Select your domain in the dropdown
- Select "TXT" from the dropdown for "Type"
- Copy/Paste the following line into the "Value" field (and make sure that you change your email when you paste it)
- v=DMARC1; p=none; rua-mailto:your_email@youremail.com
- Set the TTL for any number within the "minimum" and "maximum" levels
- (I usually go with the "minimum" value)
Back to Mail-Tester
Go back to Mail-Tester.com
Return to Mail-Tester.com and copy the new email address that is provided in the box.
Send an email to that email address using the email account of which you're trying to improve the deliverability. (Red arrow in the screenshot)
For the Subject you can use something like "Configuration Check for this Email Account" and then in the body say something like "This is an email to check the deliverability of my email account."
Once you've sent that email, click the "Check Your Score Button" on Mail-Tester.com (yellow arrow in the screenshot).
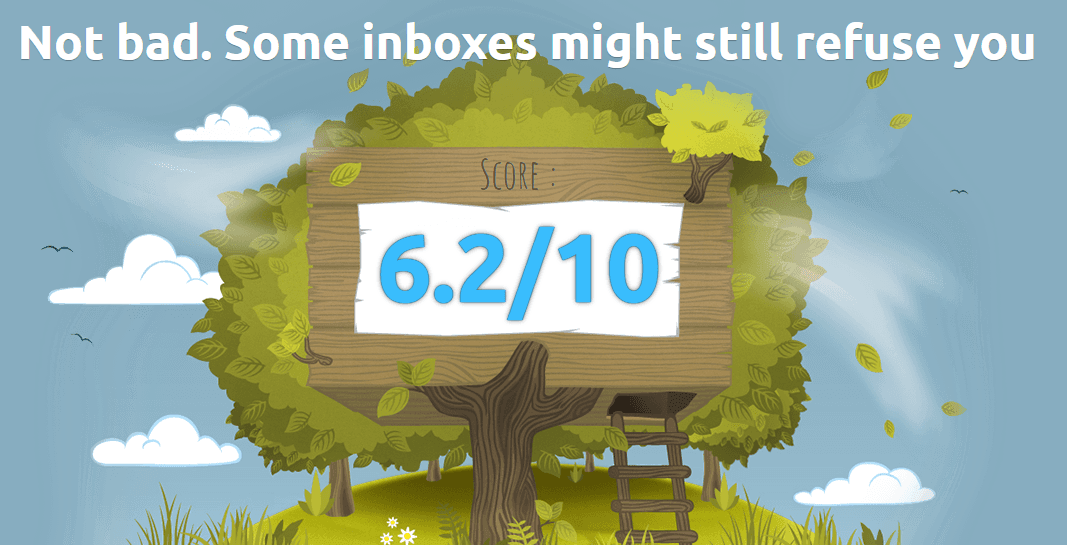
WTF?!? My Score Went DOWN!

My Score DECREASED!
You'll likely see that your score DECREASED on the second test. That's to be expected and it's a necessary step! This happened for 2 reasons:
- They will now provide us with an updated SPF record that we'll need to use instead of the original value.
- We likely haven't waited the minimum 15 minutes for the DMARC record to resolve
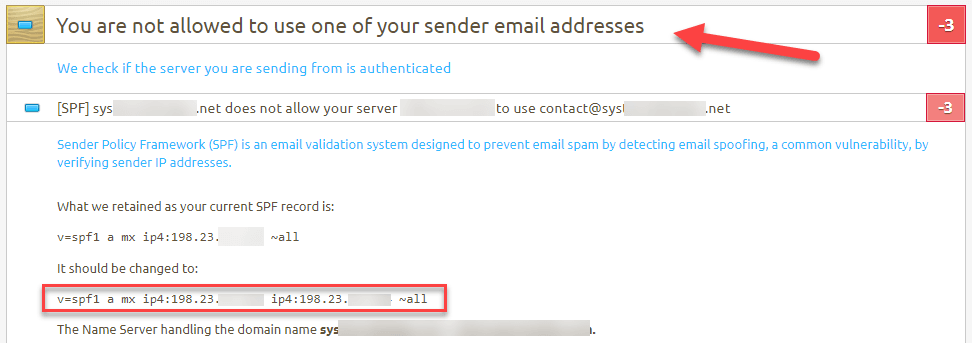
Get Your NEW SPF Value
You'll See a New SPF Value
In the section that says "You are not allowed to use one of your sender email address" go to the section that starts with [SPF] and expand it.
In that section, you'll see a message that indicates that you're using an incorrect SPF record. Under it will be a different value that you need to collect. This is the red box in the screenshot.
Copy that value.
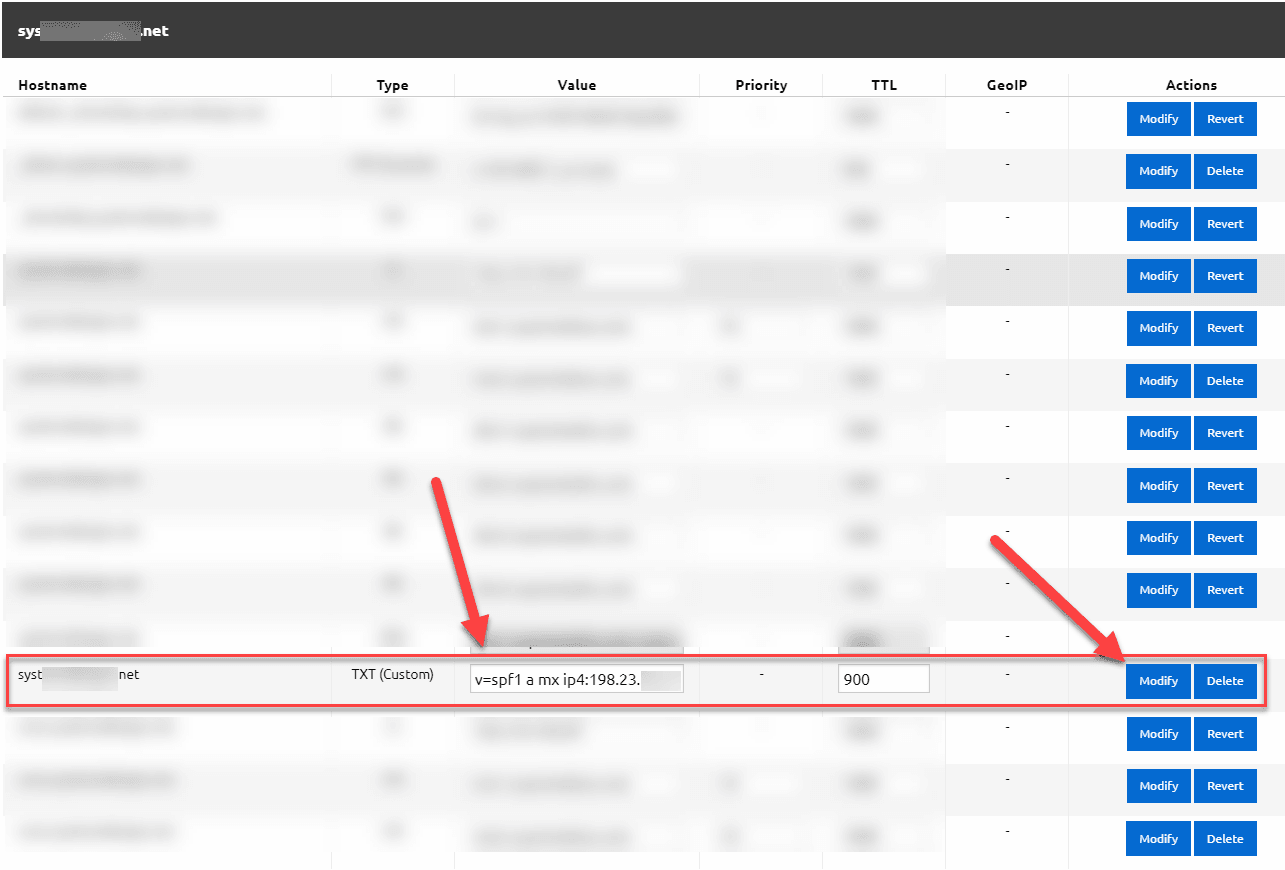
Modifying the SPF Record
Modify the SPF Record
Back in our DNS Records in our hosting control panel, we need to find the original SPF record that we entered. Once we locate it, we need to replace the original value with the new one that we just got from Mail-Tester.com. Once you've replaced the SPF record click the "Modify" button.
See the screenshot for reference.
Wait 15 Minutes
The Value of TTL
We need to wait for whatever value you entered into the TTL values when adding the DNS records (likely 900 if you followed the screenshots). This value is in seconds.
Therefore if you entered 900, then we'll need to 15 minutes (900 seconds). This gives the server time to pick up the new records that we've entered and modified.
Once More to Mail-Tester
Head back over to Mail-Tester.com
Return to Mail-Tester.com and copy the new email address that is provided in the box.
Send an email to that email address using the email account of which you're trying to improve the deliverability. (Red arrow in the screenshot)
For the Subject you can use something like "Configuration Check for this Email Account" and then in the body say something like "This is an email to check the deliverability of my email account."
Once you've sent that email, click the "Check Your Score Button" on Mail-Tester.com (yellow arrow in the screenshot).
VOILA! You Should Have a 10/10
Congratulations!
You've done it! You should now have a perfect score of 10/10 with Mail-Tester.com! Basically this means that your email address should be highly trusted and hopefully keep your emails from landing in the Spam folder of your recipients.
Note that you have to do your part. If you blast out un-solicited emails that are manually marked as spam, you'll still get marked as an abuser. The same is true if you're sending out hundreds of emails per day from one email account... Do your part- and your emails should find the inbox!
Now That You're Configured, Let's Warm It Up
How to Warm Up Your Domain
There are essentially two ways to "warm up" your domain for maximum deliverability. You can do it manually (free, but time consuming and tedious), or you can use a third party service which will automate this process (highly recommended).
First, let's get some ground rules for email sending:
- Some Top Level Domains (TLDs) are better than others. The ones you should try to use if at all possible are:
- .com
- .org
- .net
- .edu (must be an educational institute)
- .gov (must be a government agency)
- You should NEVER (let me reiterate NEVER) try to send mass outbound emails from a domain name that is less than 14 days old (and 30 days is even better).
- Your domain's email reputation will largely impact your ability to get into the inbox
- Some things that hurt your email reputation:
- A lot of recipients mark your emails as spam (this one is a killer)
- You send a lot of emails that bounce back because they are bad email recipients
- You have a very low open/response rate to your emails
So the process of "warming" a domain means to help do the opposite of these things. It means to send and receive as many emails as possible that are opened, replied to, links are clicked, etc.

Recommended Service
The domain warming service that we recommend is MailWarm. For most users, the "starter" package will be sufficient for their needs.
The Manual Warming Process

Manual Warming of a Domain
In order to manually warm up a domain, you need to coordinate with some friends, family members, co-workers, or other email addresses that you can access to perform several of the following steps:
- Every day, send a minimum of 35 emails to a minimum of 20 different email addresses (but the more, the merrier).
- The recipients of those emails should open them, click any links that are included in the email, and reply to them.
- You should reply to their replies to create a "chain/thread" of an email conversation to make it look natural. This should be done with no more than 20% of the emails; the rest should have different subjects.
- Repeat this process daily for a period of no less than 14 days (but 30+ days is even better).
Yes, this is a time consuming process. Yes, it's tedious and will likely annoy you and the other people in involved. But it's a free solution to a necessary step for maximizing the amount of emails you have that end up in the inbox instead of the Junk folder!
Get an Automated Solution
Paid Domain Warming Service
Since your time is your most valuable commodity, and because this is such a crucial step in maximizing the deliverability of your emails, I highly recommend getting a paid service to warm up your domain for you. The team at MailWarm does exactly that, and they are experts in their field.
With their "starter" package, they will sync with your email account and will will send dozens of emails to their accounts (more than 1,000 of these accounts) on a daily basis at the right frequency. These emails are then marked as non-spam, opened, starred, and replied to. By doing so, your email, domain, and IP reputations will raise and keep your emails out of the spam filters!
Recommended Service
The domain warming service that we recommend is MailWarm. For most users, the "starter" package will be sufficient for their needs.
